Module 10 - Creating Custom Tools
This week we practiced the process of creating a stand-alone Python script into an ArcGIS script tool. There are multiple benefits of converting a script into a tool, such as:
- tools include a dialog box with multiple parameter property settings that are customizable;
- these tool dialog boxes reduce user error, which in turn reduces the need to write a lot of error-checking code;
- environment settings are passed from the tool application to the script; and
- a script tool can be easily shared with GIS users that don't have knowledge in Python or programming in general.
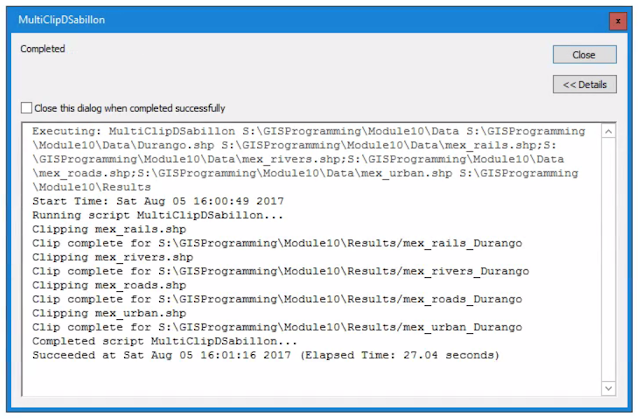
For our lab assignment, we were tasked to create a script tool for an already-written script (that we slightly modified), and then share it via a compressed zip. Below is a screenshot of the tool I created.
To successfully accomplish our assignment, we used the arcpy.GetParameter() function to replace hard-coded values in the Python script for the parameters we set-up in the script tool. We learned how to make a tool parameter act as a "list" object by setting the parameter's "Multivalue" property to "Yes". And, we replaced print statements with arcpy.AddMessage() function statements so that they appear as printed text within the Progress/Results dialog box of the script tool, as shown in my screenshot below.
The general basic steps that are required to turn a stand-alone Python script into a script tool in ArcGIS are as follows:
1. Create a toolbox via ArcCatalog in ArcMap. (You must create a toolbox first before creating a script tool to store it in!) In ArcCatalog in ArcMap, right-click in the desired folder location > New > Toolbox.
2. Create a script tool in the toolbox by right-clicking on your newly created toolbox > Add > Script.
3. In the Add Script Wizard window, name and label your script (no spaces or underscores allowed) and add a description of what your script tool accomplishes. Make sure both the “Store relative path names” and “Always run in foreground” checkboxes are checked. Click Next.
4. Reference the Script File path for the script you wish to create a tool for, in here. Click Next.
5. Add Parameters, such “Input” and “Output Features”, and adjust the Parameter Properties as needed. Click Finish.
6. Make changes to your stand-alone script by replacing hard-coded values with arcpy.GetParameter(#), corresponding for the parameters you set up in Step 5. Save your changes.
7. Test your script by running it in ArcMap.
8. Done! You’re script tool has been created.
References:
Zandbergen, P. A. (2013). Python scripting for ArcGIS. Redlands, CA: ESRI Press.


Comments
Post a Comment